Chair Yoga For Seniors With Limited Mobility—Truly Gentle
If it feels like you’re stuck in a downward spiral of decreasing mobility here’s the one thing you need to know to get out of it. Simply by being active in whatever way your body is capable of not only stops you from losing more mobility, but helps you start getting your mobility back. And the most manageable way to do that is with chair yoga made for seniors with limited mobility.
What are the benefits of chair yoga for older adults?
Chair yoga helps to…
- Loosen up tight muscles
- Relieve tension through gentle stretches
- Reduce chronic pain
- Decrease stress
- Improve circulation
- Lower blood pressure
- Protect joints
- Build strength
- Improve balance & mobility
- Reduce inflammation
- Reduce the risk of falls
Why should you try chair yoga?
If you have limited mobility, the chair provides safety and support so you can get moving without worrying about stumbling, falling or hurting yourself. It’s one of the easiest ways to stay active in a way your body can handle—and that’s the key to stopping the stiffness and pain that’s making all your daily activities so much harder to do these days. It’s incredibly easy to get started so give gentle chair yoga a try now!
Simply follow along with the video or get the step-by-step instructions below.
Even though it’s a gentle routine, be sure to have water handy to stay hydrated. To learn more about how hydration needs change as you age—read “The Truth About Dehydration In Seniors” (Click Or Tap Here)
Chair Yoga For Seniors With Limited Mobility—In 20 Minutes Or Less
If you liked this class, you can get the entire 7 day gentle chair yoga program on sale now (Click Or Tap Here)
Step 1: Connect To The Breath
- Sit up tall, close your eyes & place your hands on your belly.
- Inhale & feel your belly press into your hands.
- Exhale & feel your belly draw back towards your spine.
- Repeat 3 times.
Step 2: Stretch Out Rib Cage Muscles
- Slide your hands to your sides & feel your rib cage.
- Inhale & feel your rib cage expand.
- Exhale & feel your ribs draw in towards center.
- Repeat 3 times.
Step 3: Stretch Out Upper Body
- Bring one hand to the belly & one hand to the chest.
- Inhale & feel your belly, ribs & chest expand.
- Exhale & release.
- Repeat 5 times.
Step 4: Increase Back Mobility With Seated Cat Cow Pose
- Move forward closer to the edge of your chair.
- With hands on your knees, inhale & slide them back along your thighs towards your body as you lift your chest and look up slightly.
- Slide your hands forward back to your knees as you exhale and round your back.
- Repeat 8 times.
Step 5: Create Movement In Shoulders
- Inhale & bring shoulders up around the ears.
- Roll shoulders forward and draw them back down as you exhale.
- Repeat twice. Change directions. Repeat twice in opposite direction.
Step 6: Increase Upper Back Mobility With Modified Cat Cow Pose
- Interlace your fingers & turn palms to face away from you. Lift to chest height.
- Inhale & arch your back, allowing your arms to move up as you lift your head.
- Exhale & round your back, allowing your arms to move down in front of you.
Step 7: Create Mobility In Chest & Back
- Maintain interlocked finger pose from last step.
- Hold arms straight out in front of you at chest height.
- Start making circles clockwise with your arms & palms, feeling it in your rib cage, sides & back. Repeat for 8 circles.
- Switch to counterclockwise & repeat for 8 circles.
Step 8: Create Neck Mobility
- Sit up tall, looking straight ahead.
- Bring your left ear up & lower your right ear towards your shoulder by tilting your head.
- Hold for 4 breaths then switch sides & hold for 4 breaths.
- Exhale & turn head to the left.
- Inhale & return to center.
- Exhale & turn head to the right.
- Repeat 7 times in each direction.
- Tilt head up, looking towards the ceiling.
- Tuck the chin & lower the forehead.
- Repeat 7 times in each direction.
Step 10: Release Back & Neck
- Inhale & sit up tall in your chair with hands on your thighs.
- Hinge at the hips as you exhale & bend forward as far as you can, eventually rounding the spine over the thighs.
- Take two breaths as your head hangs over your legs, feeling your neck & back release.
- Press into your feet & hands as you extend through the spine to lift back up.
Step 11: Create Movement In Lower Body
- From sitting position, lift up one knee & extend your leg out in front of you.
- Bend the knee & lower foot back to the ground.
- Repeat 5 times. Switch sides & repeat 5 times.
Step 12: Seated Spinal Twist
- Cross your right thigh over your left leg (or your right ankle over your left if that’s too difficult).
- Inhale & twist from your navel.
- Hold onto the back of your chair with one hand & press into your knee with your other hand.
- Hold for 3 deep breaths.
- Return to starting position & switch sides. Hold for 3 deep breaths.
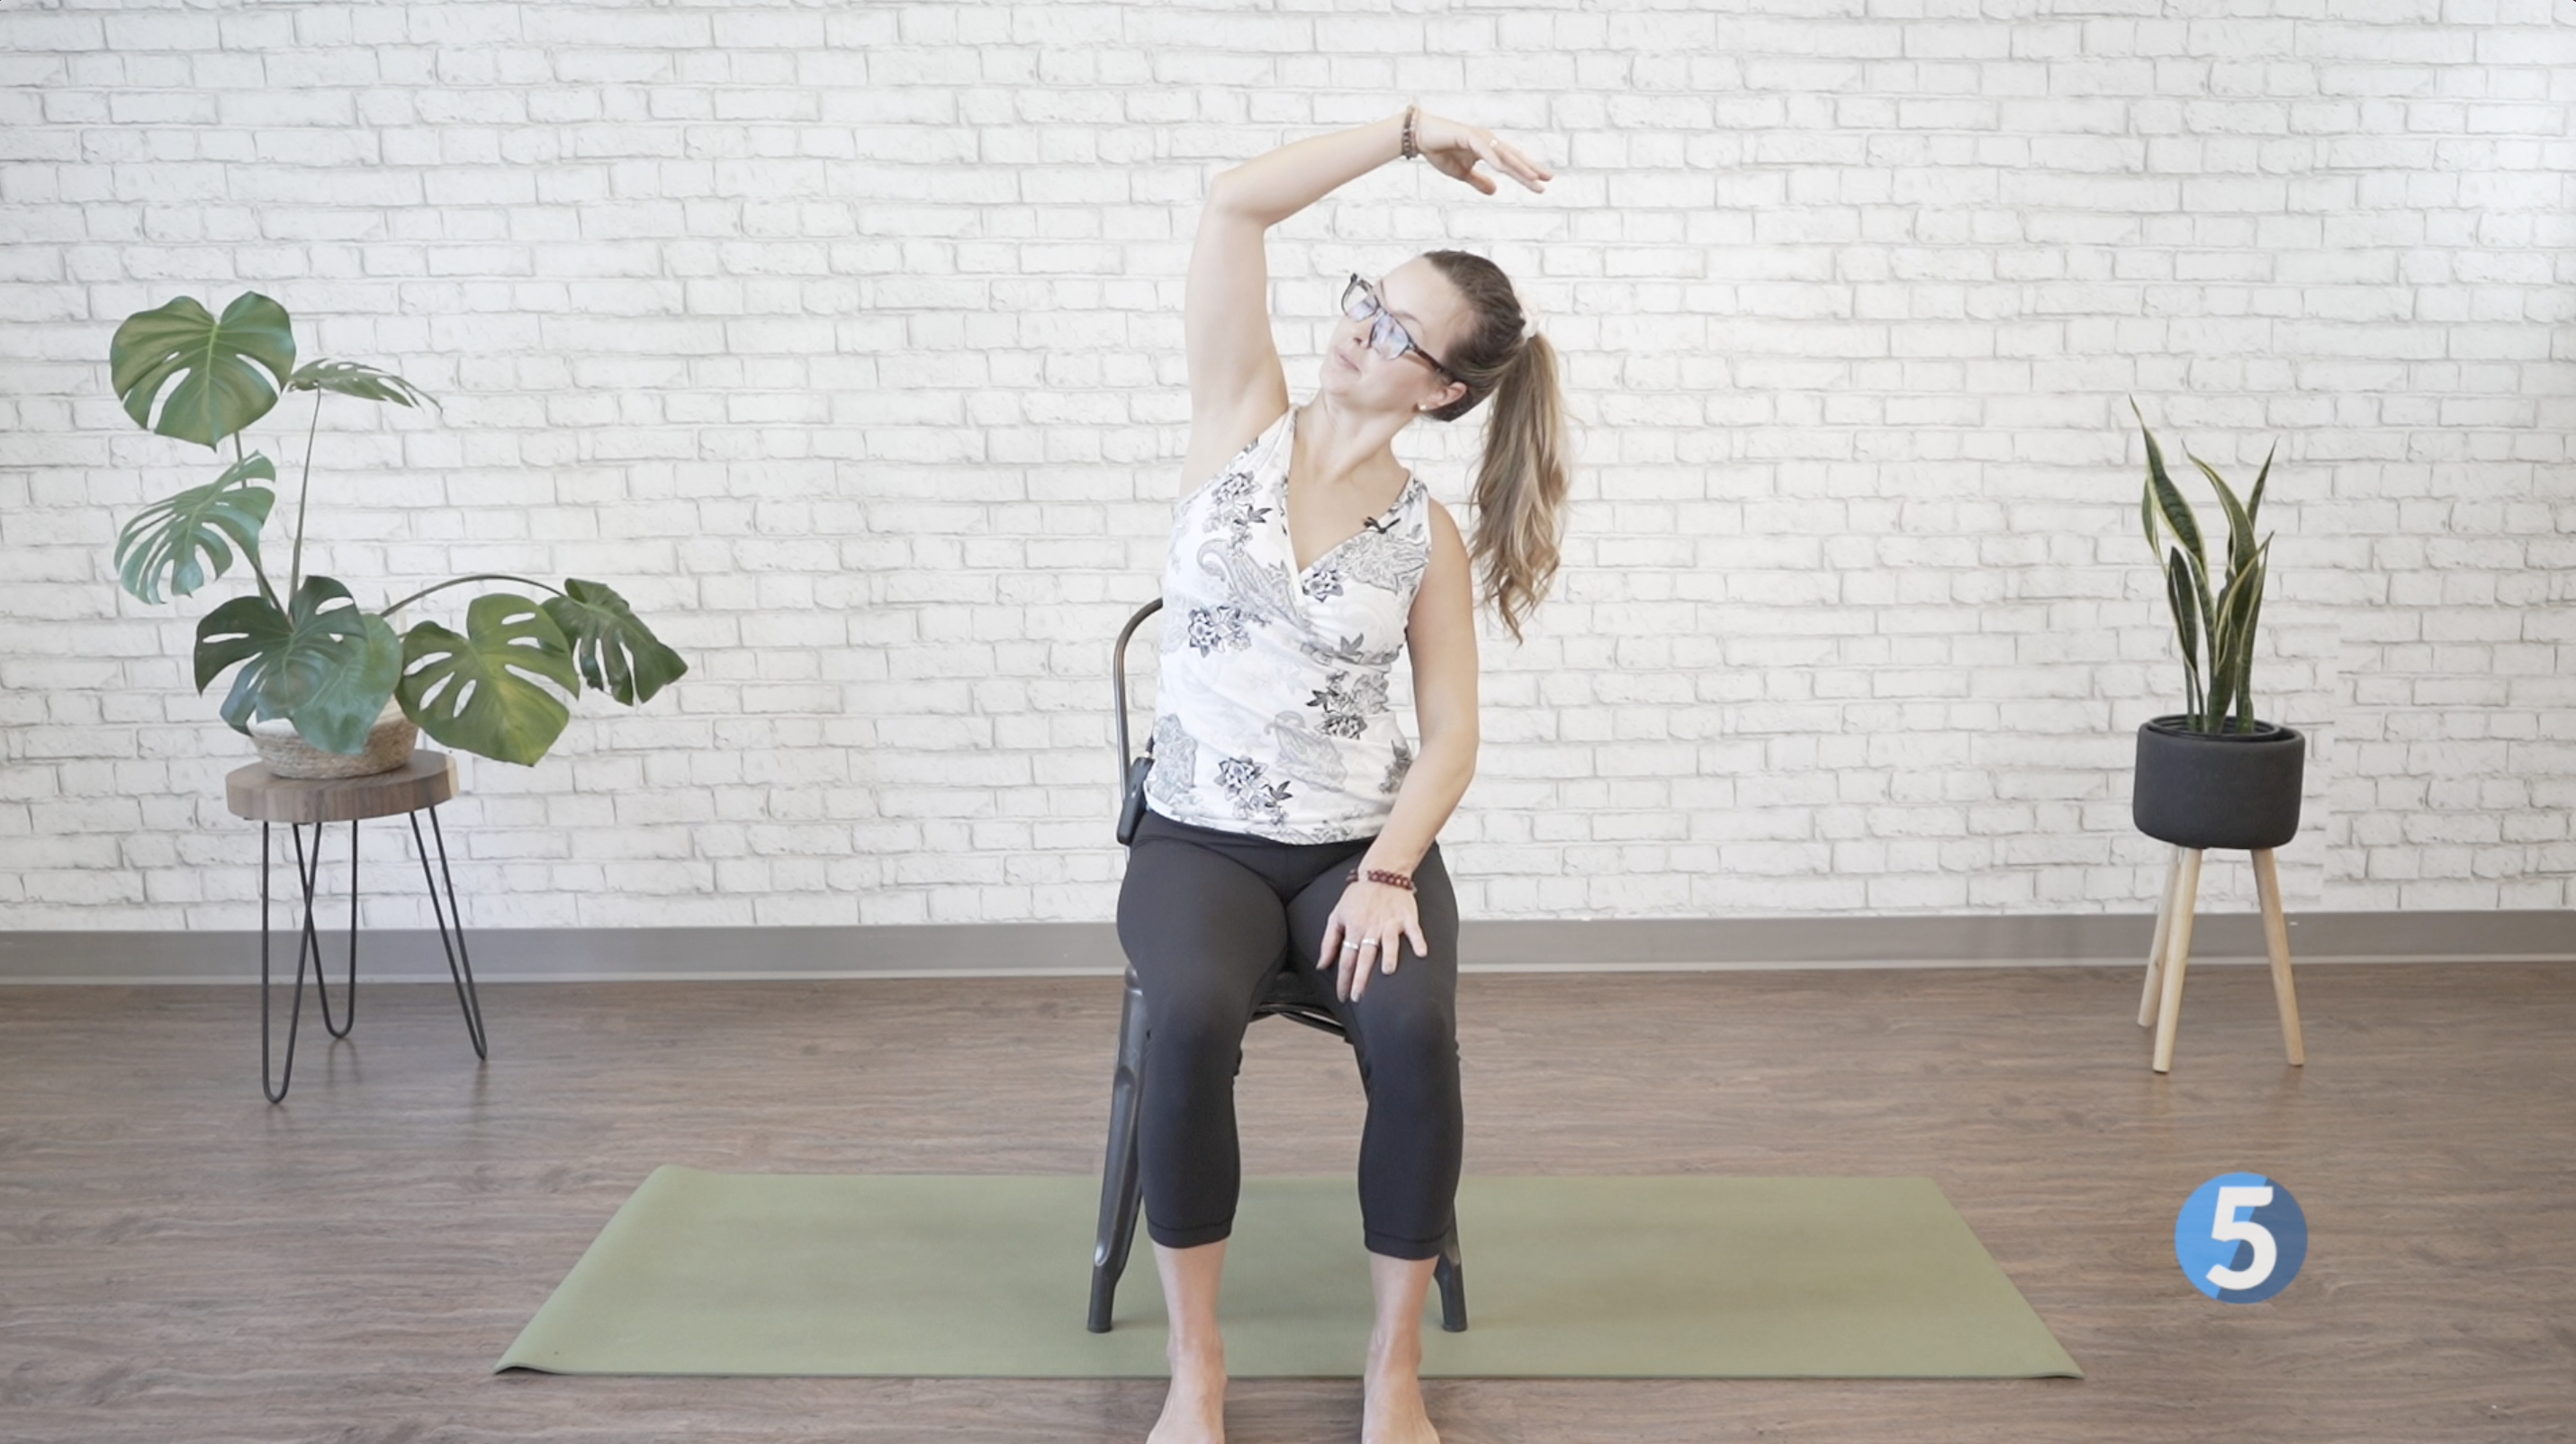
Step 13: Stretch & Mobilize Upper Body
- Inhale and bring arm out to the side & up over head.
- Lean your body in the direction your arm is pointing & turn your head to look towards the elbow of your raised arm.
- Hold for 1 breath & switch to other side. Repeat 5 times on each side.
For best results you’ll want to do this sequence for seniors with limited mobility regularly. Try to aim for 3 times a week or every other day to start. And if you want more variation to keep it interesting as you regain mobility, balance & flexibility—you can get the entire 7 day program “Gentle Chair Yoga For Aging Adults – Volume 1” on sale!